Fitting Front USB2 & Firewire Ports to an Original G4
//Home/Hacks&Mods/Front_USB2/Page2/Page3/
Page <1> <2> <3>
Of course, it looks a bit rubbish like that, so time to make it look more like it's meant to be there.
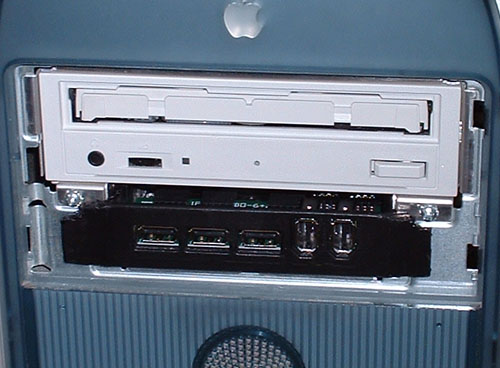
Fit the Zip bezel and it looks like this:
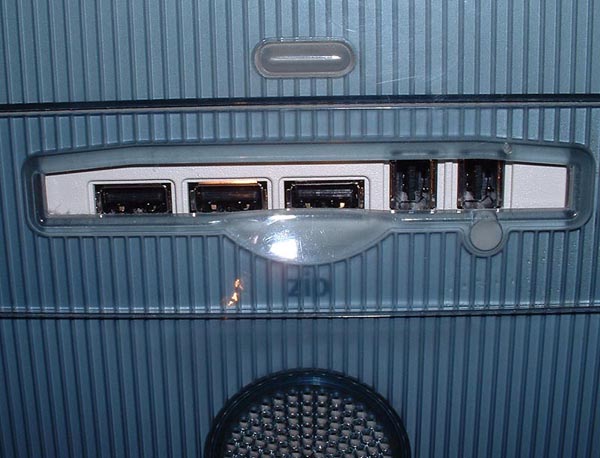
It's not far off at all. I decided the edging around the Zip slot would
be a good cutting guide, so armed with a small saw I set to work:
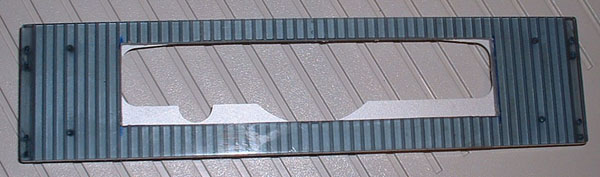
Above is the finished bezel, with the backing fitted for comparison.
'Zip' as seen in the top picture is printed on the backing, so turn it
over and your USB Hub won't have 'Zip' written under it. I did trim the
backing down, but it looked rubbish as you can see it through the
translucent bezel, so you have to cut it neatly and accurately. I just
used the bits at either end.
If you've got the tools, a more rounded cutout would probably be more
aesthetically pleasing. You might also think that I've made the hole a
bit too tall, but unlike slim USB cables some flash drives can be quite
chunky, and I wanted to make sure there was room for all eventualities.
Fit the bezel and....
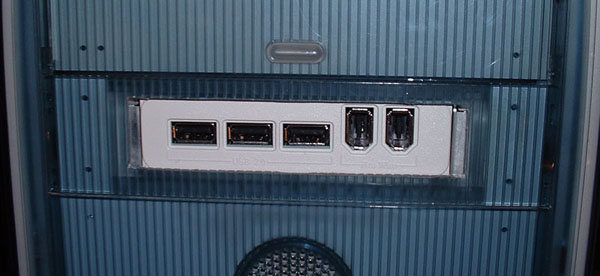
Oops, too wide. The Zip drive was only just wider than an actual disk,
so cutting away the side edging has left the hole too wide. But leaving
the edging on would make it look odd too. Obviously not a problem if
you have the blank bezel.
An alternative here would be to cut the bezel so the hub can be fitted
slightly forward, so it was flush with the bezel, instead of behind it.
You'd have to cut the hole to the exact size though, otherwise it would
look really rubbish. You'd probably have to drill new holes in either
the drive cradle or the hub too, to hold it in the right place.
The hub sits slightly proud in the Mac, as did the Zip drive, so I just
cut up an old PeeCee blanking plate (so the texture of the plastic was
similar) and glued it to the sides.
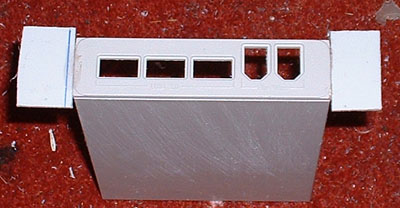
Initially I cut them too wide and too tall. You have to allow a notch
for the screws that fix the cradle in, as you can see from the picture
below:
All painted and fixed in place. Add the bezel and:
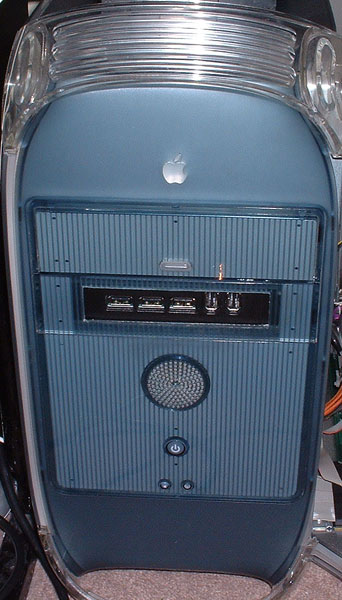
Fitted and finished. Not too bad. The paint finish isn't as neat as I'd
like it, but with it standing on the floor and the paint being black,
you can't really tell.
Anyhoo, the standard has been set. I've seen much worse efforts, but I
know with a box full of spare bezels, I could do a better job next
time.
If you've learned from my mistakes, and made a better job of it, feel free to email piccies to me :)